HMI
Basics
Posted on:
November 4, 2025Canvas Overview

5 minute read
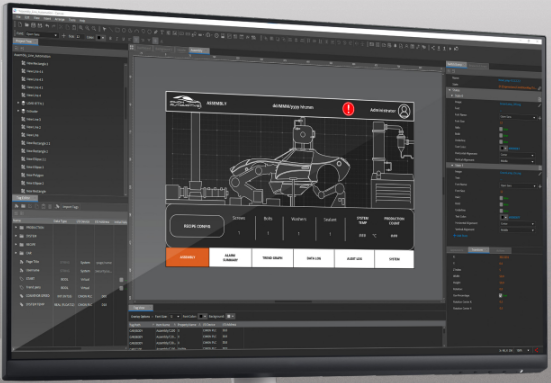
This guide will help you learn about Canvas, our intuitive and powerful HMI programming software. Canvas is designed to help engineers and developers easily create, customize, and optimize human-machine interface solutions. Let’s explore how this software can enhance your HMI development experience.
Getting Started with Canvas
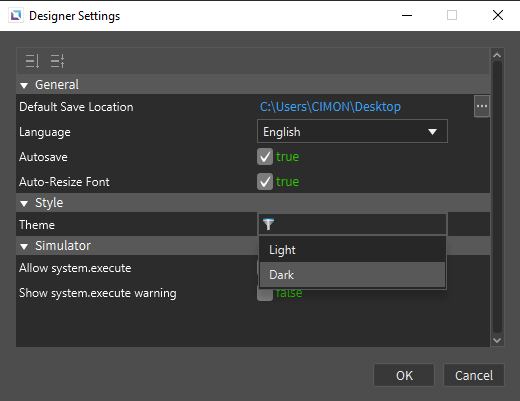
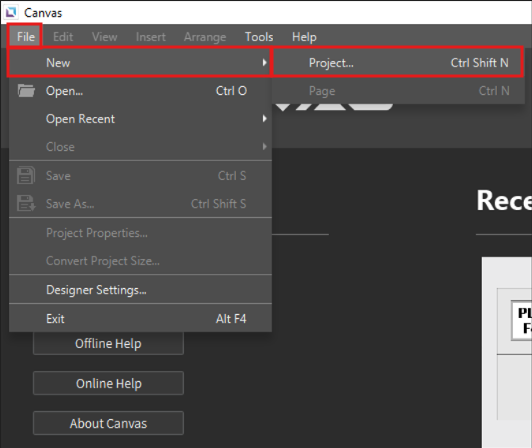
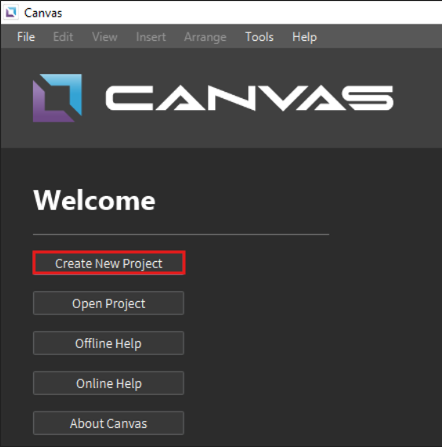
Upon launching Canvas, the welcome page displays all recent projects. To begin, click File in the top-left corner. The dropdown menu lets you access the designer settings and switch between light and dark themes.
To create a new project, click File > New > Project or use the button under the Welcome sign.
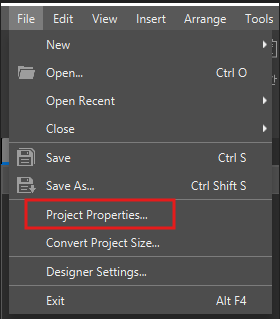
Once a project is created, the main workspace appears. Navigate to File > Project Properties to configure project settings, including page settings, runtime, identity and access management (IAM), passwords, audit log, email (SMTP), and remote page control.
Navigating the Menu Tabs
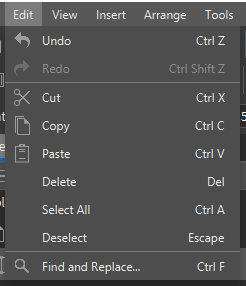
Edit Tab
Provides essential editing functions such as undo, redo, cut, copy, paste, delete, select all, deselect, and find & replace.
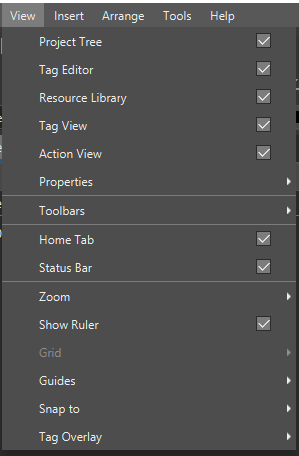
View Tab
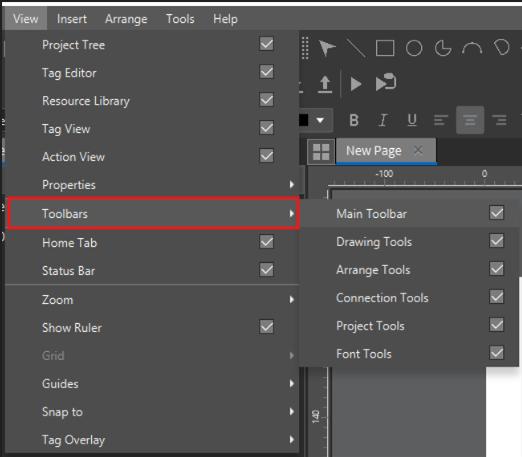
Allows interface customization, enabling features like Project Tree, Tag Editor, Resource Library, Tag View, Action View, Properties Panel, Toolbars, Zoom, Ruler, Grid, Guides, and Tag Overlay.
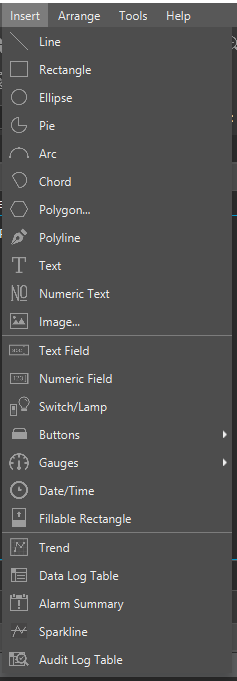
Insert Tab
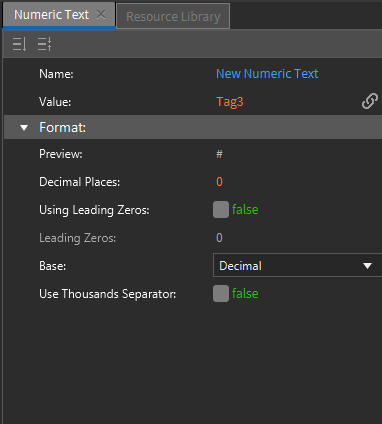
Used for adding drawing objects, text, numeric text, buttons, gauges, date/time fields, fillable rectangles, and essential components like trends, data log tables, alarms, sparklines, and audit log tables.
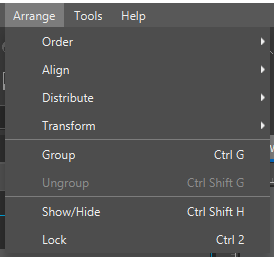
Arrange Tab
It helps adjust object positioning, allowing you to move objects forward or backward, align, transform, group or ungroup, show or hide, and lock objects.
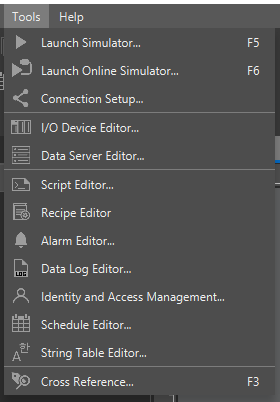
Tools Tab
This tab provides access to advanced features such as:
- Launch Simulator or Online Simulator
- Set up connections using an IP address, USB mini-B, or Type-C
- I/O Device Editor (supports multiple protocols)
- Data Server (supports MQTT JSON Publisher and other protocols)
- Script Editor (for writing JavaScript ES5 scripts)
- Creating Recipes, Alarms, Data Logs, and IAM settings for user permissions
- Schedule Manager & Multi-language support through the String Table Editor
- Cross-reference tool for searching project tags, scripts, pages, and permissions
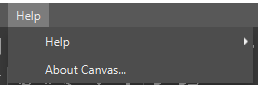
Help Tab
Provides access to the offline help file, online help file, and the about section, which displays the current version of Canvas.
Using Toolbars & Object Placement
To access the toolbars, enable the sections under View > Toolbar, including the Main toolbar, Drawing toolbar, Arrange tools, Connection tools, Project tools, and Fonts.
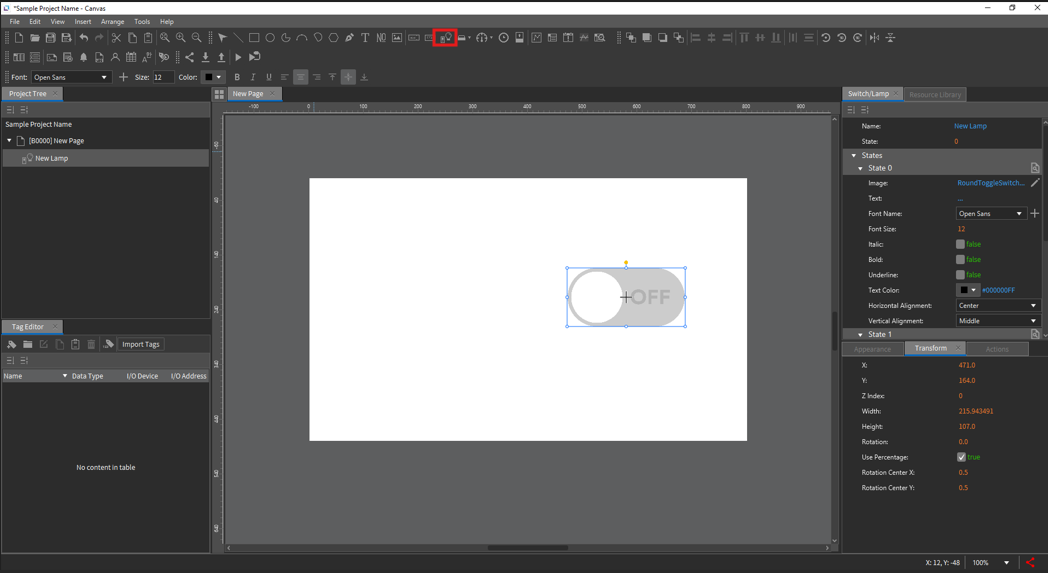
To add an object to the page, select it from the toolbar and place it on the workspace. For example, click the Switch/Lamp object and place it on the page.
Working with Project Windows
All windows are movable, allowing customization of the layout.
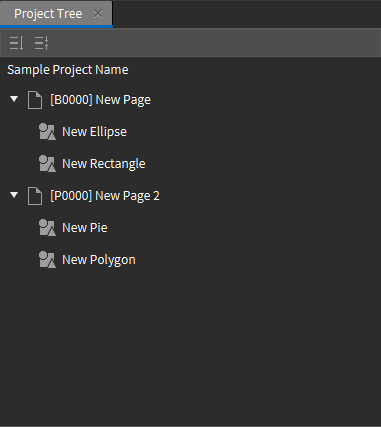
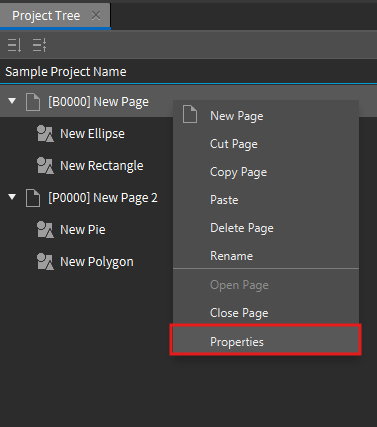
- Left Navigation Pane (Project Tree): This pane displays all base and pop-up pages and objects on each page. Options include creating new pages, cutting, copying, pasting, deleting, renaming, opening/closing, and modifying page properties.
- Page Properties: Right-clicking the page allows you to adjust settings such as page type, background, overlays, alarms, color, size, position, and actions.
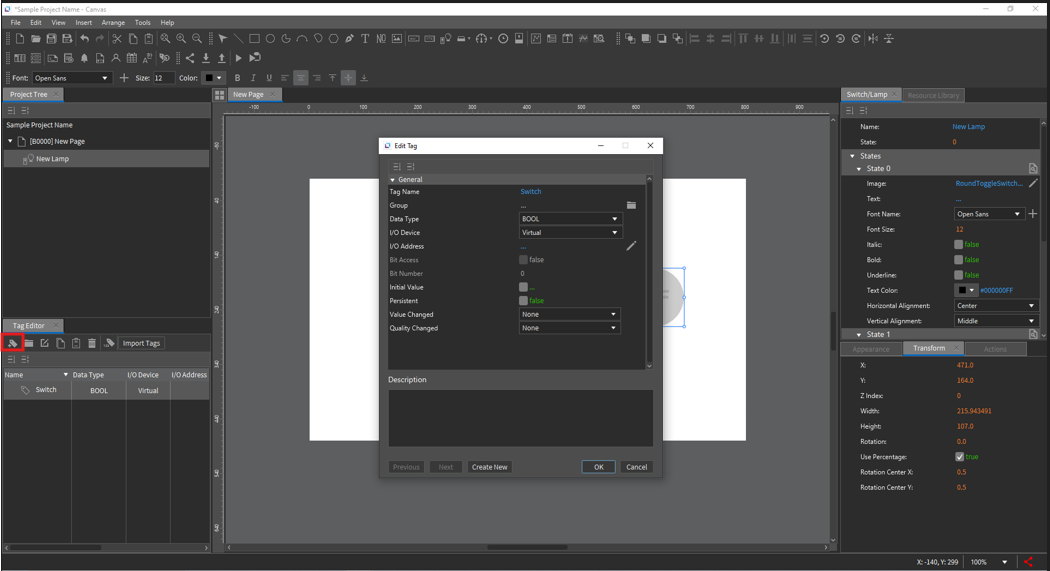
Managing Tags & Actions
- Tag Editor: Create, edit, group, copy, paste, or delete tags.
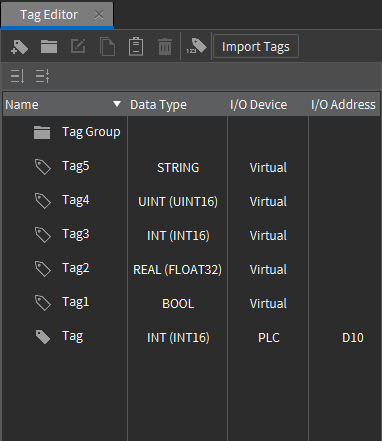
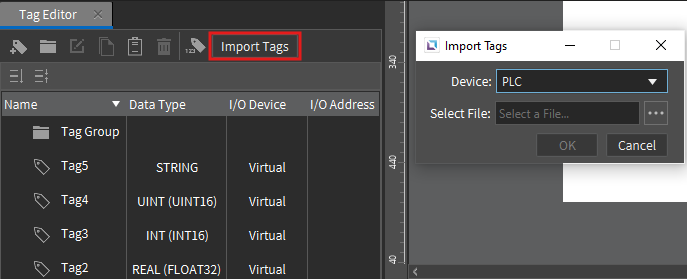
- The Import Tags feature transfers tags from other projects, Allen-Bradley (.L5X), and CICON (.csv, .VAR) files to Canvas.
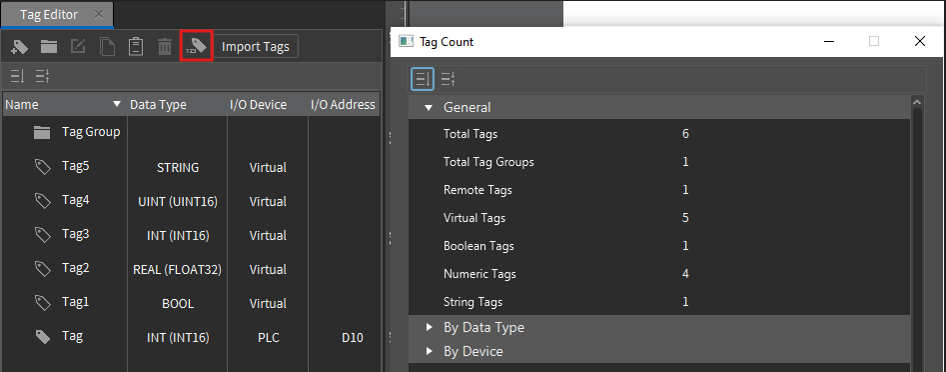
- The Tag Count displays the total number of real and virtual tags.
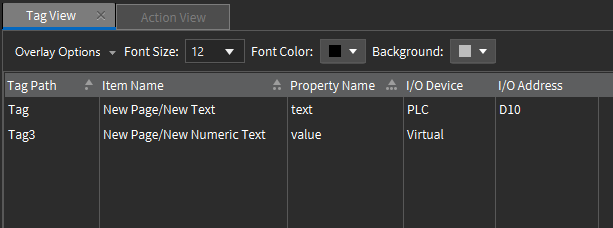
- Tag View: The Tag View pane shows all bound tag paths, the item names associated with the tags, the property type, the I/O device, and the assigned I/O address, if applicable.
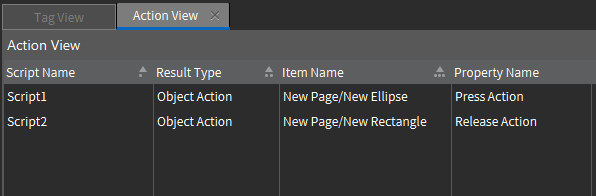
- Action View: The Action View pane lists all instances of bound actions, the script name if a script is being executed, the type of object the actions are linked to, the item names they are associated with, and the execution method.
Object Properties & Resource Library
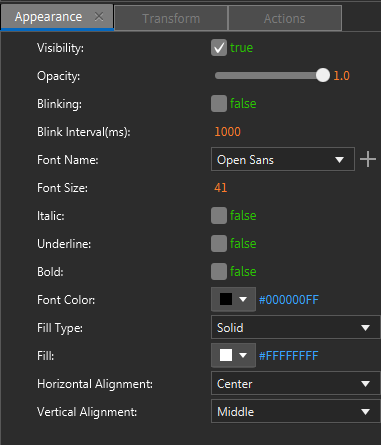
- Right Pane (Object Properties): Displays properties of the selected object.
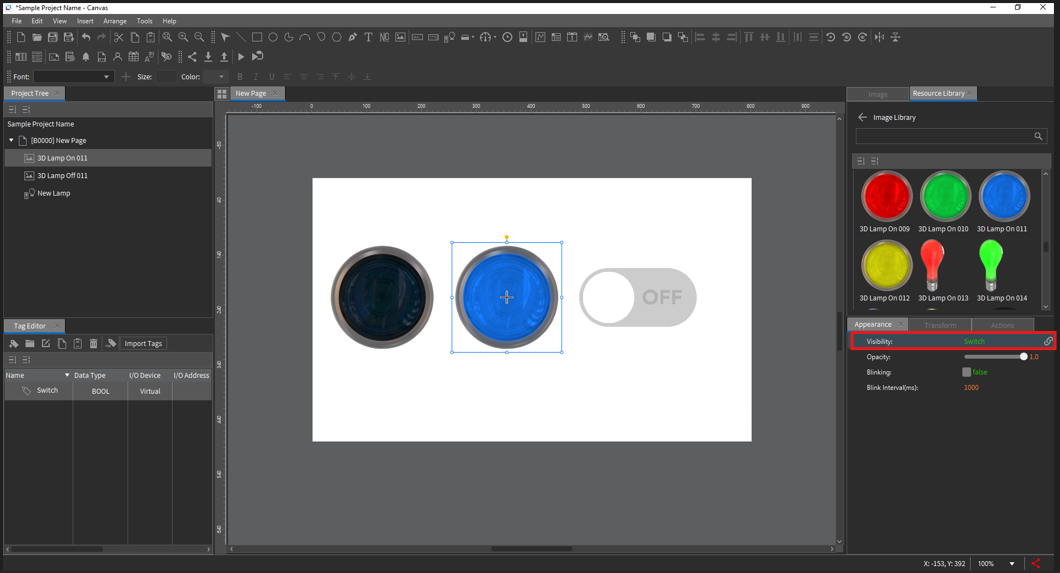
- Appearance: Visibility, opacity, blinking, fill color, stroke
- Transform: X/Y positions, width, height, rotation center

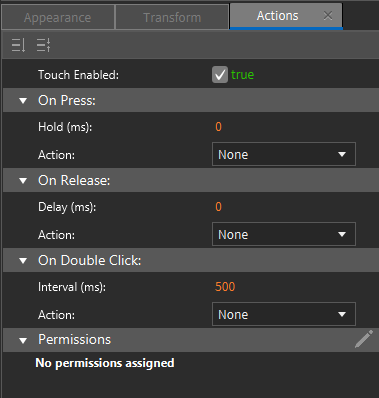
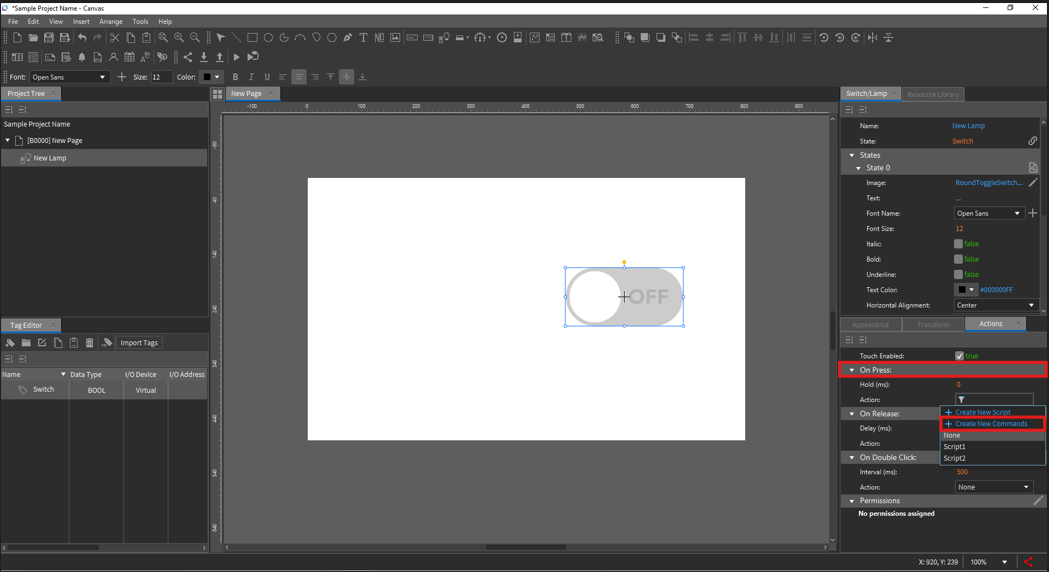
- Actions: Assign commands/scripts for On Press, On Release, and On Double-click
Permissions: Set access restrictions for specific objects
- Actions: Assign commands/scripts for On Press, On Release, and On Double-click
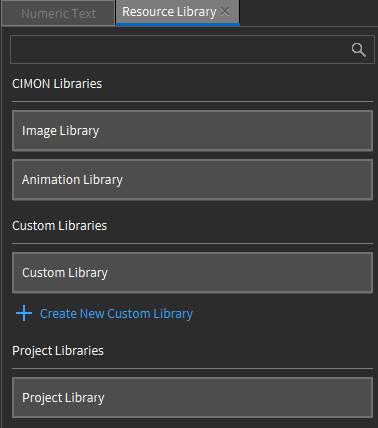
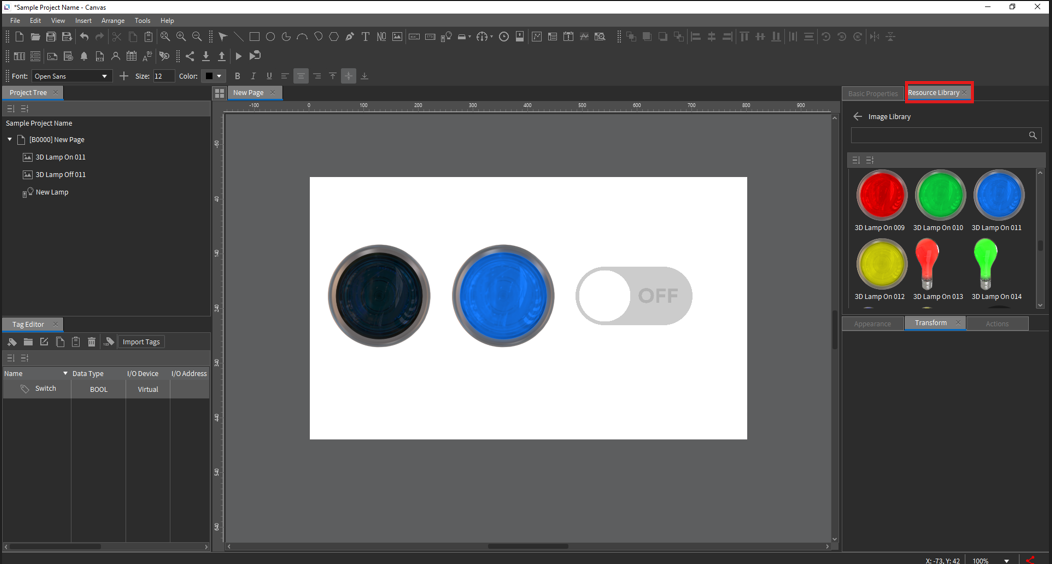
- Resource Library: Includes 2000+ images and animated images.
Users can import, delete, and rename images in the Custom Library and create, rename, and organize folders.
Project Library functions similarly to the Custom Library but is stored within the project. Acceptable image formats: .png, .jpg, .gif, .jpeg, .bmp, and .svg.
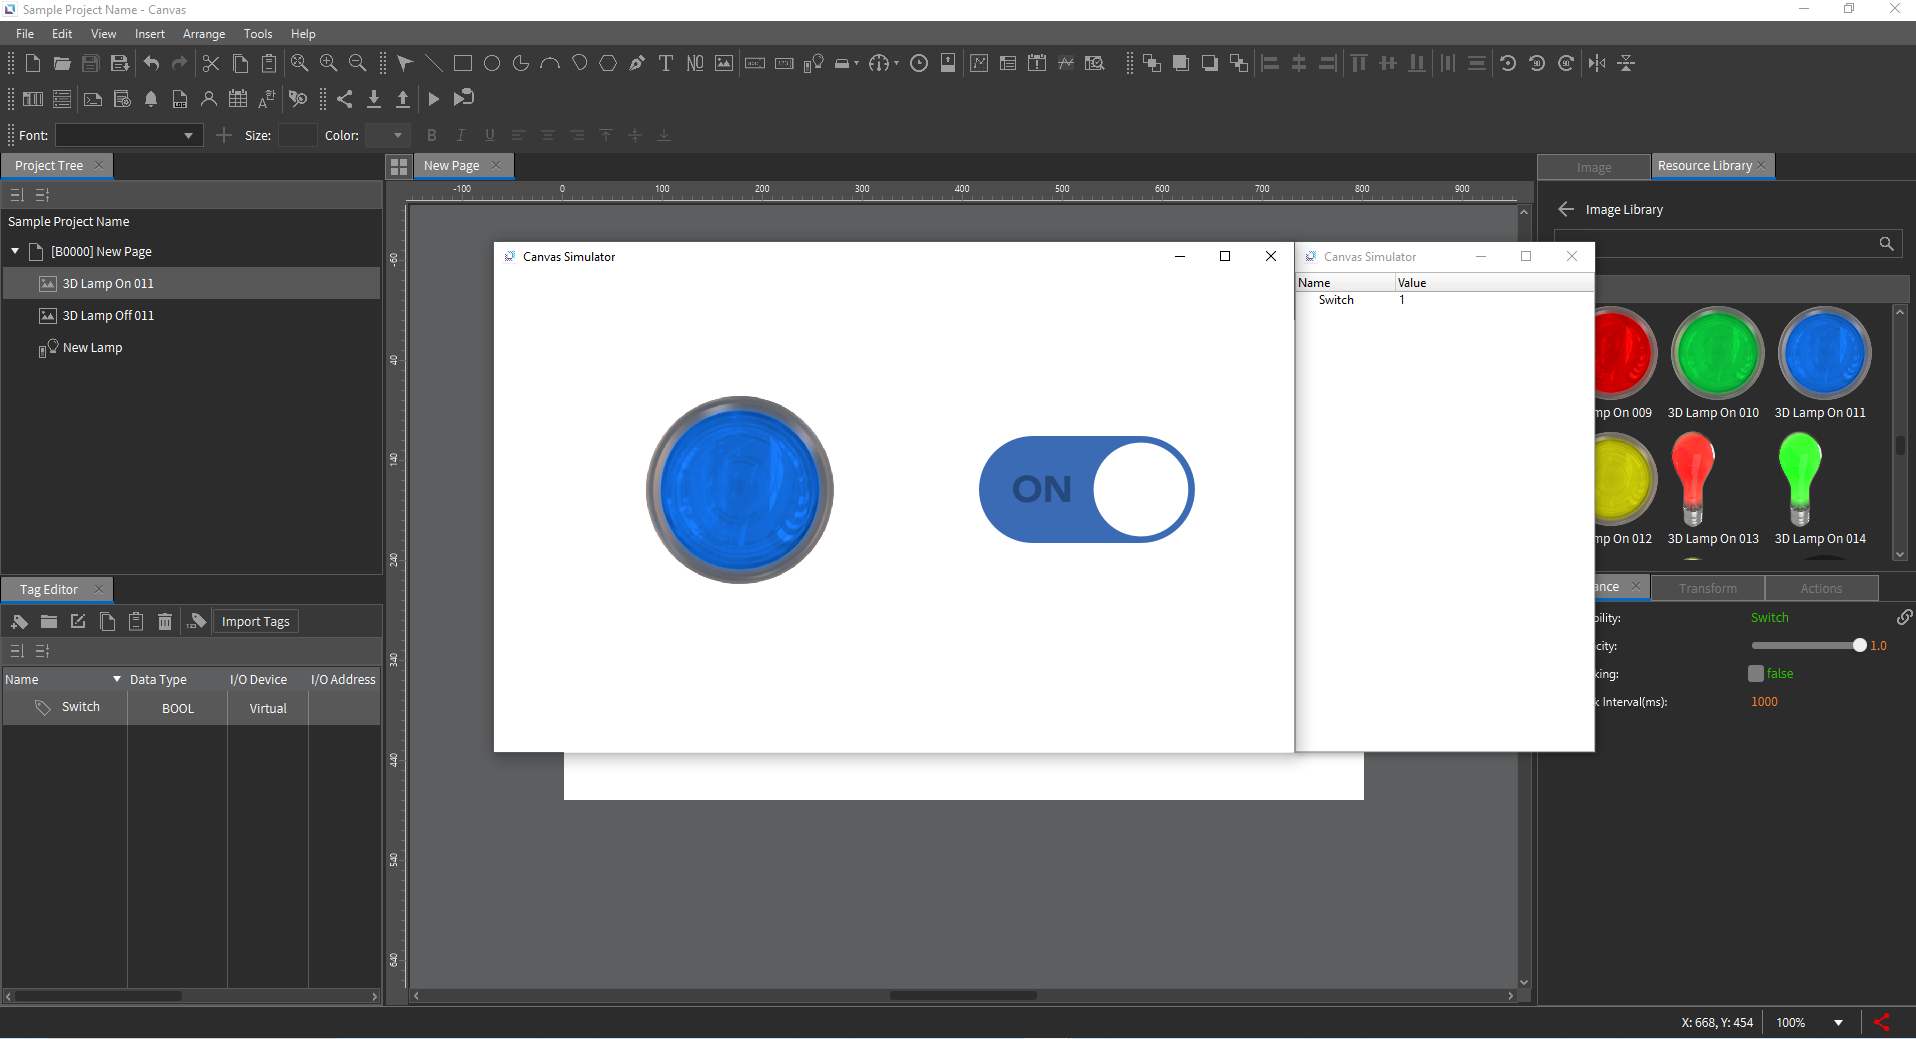
Example: Creating a Switch/Lamp Function
- Insert a Switch/Lamp object onto the page.
- Create a Boolean (bool) tag.
- You can use the Smart Binding feature (drag and drop the tag onto the object) or assign the bool tag to the object's properties State option by selecting the chain symbol.
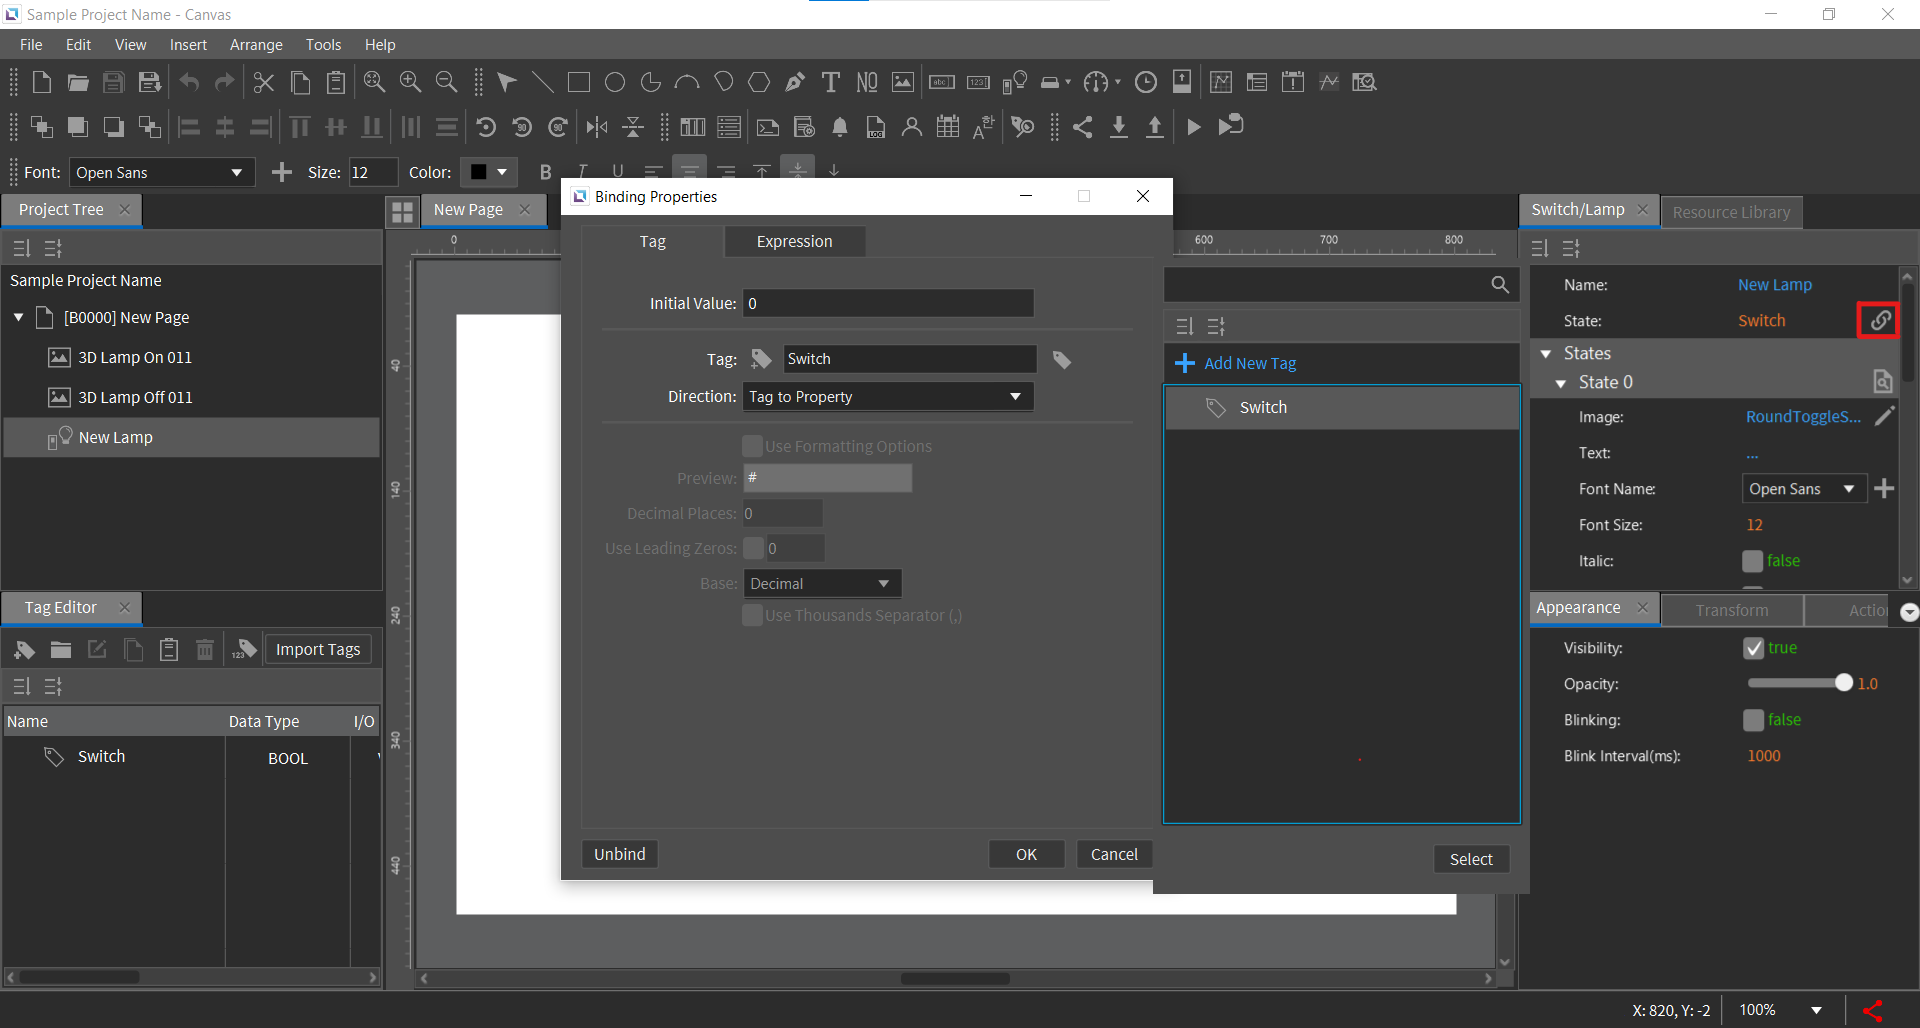
- Navigate to the On Press action and add a new command:
- Select Toggle Tag Value and choose the bool tag.

- From the Resource Library, drag and drop an OFF-and-ON light image.
- Drag & drop the bool tag into the Visibility section of the ON light. Place the ON light image on top of the OFF light image.
- Run the Simulator.
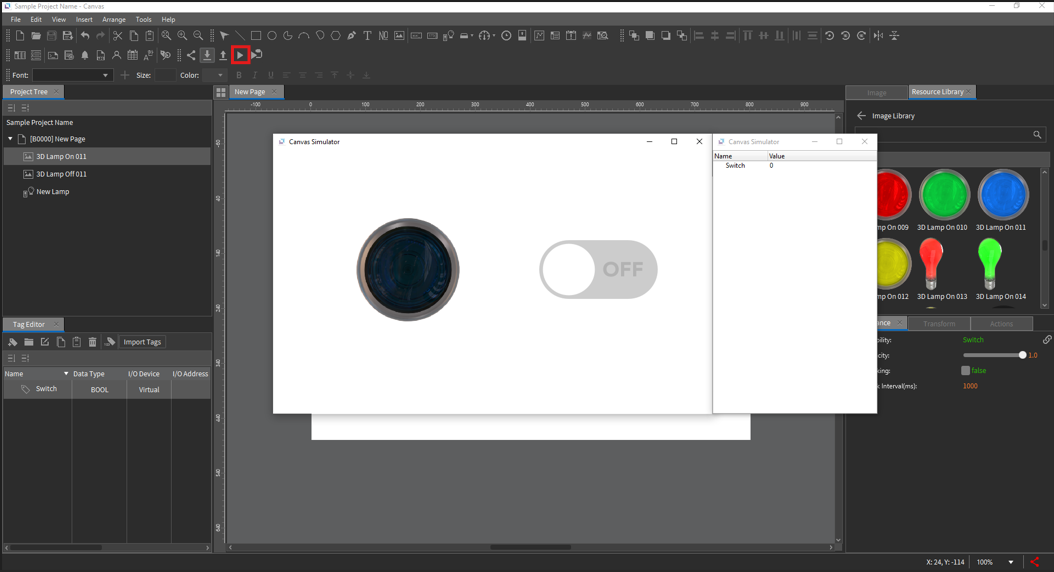
In the simulator window, a separate panel will display all project tags and values.
- Toggle the switch ON → The light turns ON
- Toggle the switch OFF → The light turns OFF
Conclusion
This guide provides a basic overview of CIMON Canvas software, covering key features and functionalities.